
It all started back during the holidays of 2010 - we were preparing to visit my brother and family up in Tennessee which starts with a thorough clean-up of the house - contrary to many people, we like to come home to a clean house rather than leave one in a shambles prior to traveling. Cindi has always complained about vacuuming under the bed - our old upright vacuum was rather awkwardly designed for performing this task - the hose attaches to the top of the housing and even extended with wands leaves much to be desired when picking up dust under things - the area of our queen sized bed means you have to move around a lot to get everything - not the best situation. Later, while visiting my family up in Tennessee we got to see and experience a whole-house vacuum and this immediately gave me the idea to install one in our ranch home - I thought it could be a surprise that would make things easier and also improve our home's value.
I began to research whole-house vacuums - there's actually quite a bit of information online about systems, costs, installation, etc. I studied the various installation manuals available until I felt comfortable doing the job myself. I have some links to generic installation manuals at the bottom of the post in case you're thinking about doing this job - you can at least think through the steps and decide for yourself. I also sorted through the brands (and trust me, I spent several weeks parsing through all the stats, comparing, factoring in warranty, features, etc.) and ultimately favored Nutone as the best of three I had settled on - mainly due to the "classic" NuTone radio installed throughout the house - I thought this would be a nice homage to the original build-out and the consumer ratings were good (I know, it may not have been the best excuse but the three units were so similar that I fell for nostalgia). NuTone makes three models that vary a bit in suction with two options: bag or bagless (the latter uses a cyclonic configuration that empties into the pail formed by the bottom of the housing - this is also where the bag would be held if it used them). I decided to go with the cyclonic version both for ease of maintenance and to keep from having to purchase bags as this is an incremental, periodic cost that I wanted to avoid.
Here's a comparison of the three NuTone cyclonic models:
After thinking about this a bit and figuring that we had about 2400 sq ft of finished space, plus about the same area in the basement, I decided that the base unit would suffice but that if I could get a deal on the next level up I would consider it. The VX475C ranged in pricing from $310 to $500 with a "good price" of $342; the VX550C ranged from $415 to $600 with a "good price" of $465; and the VX1000C ranged from $600 to $1000 with a "good price" of $629.
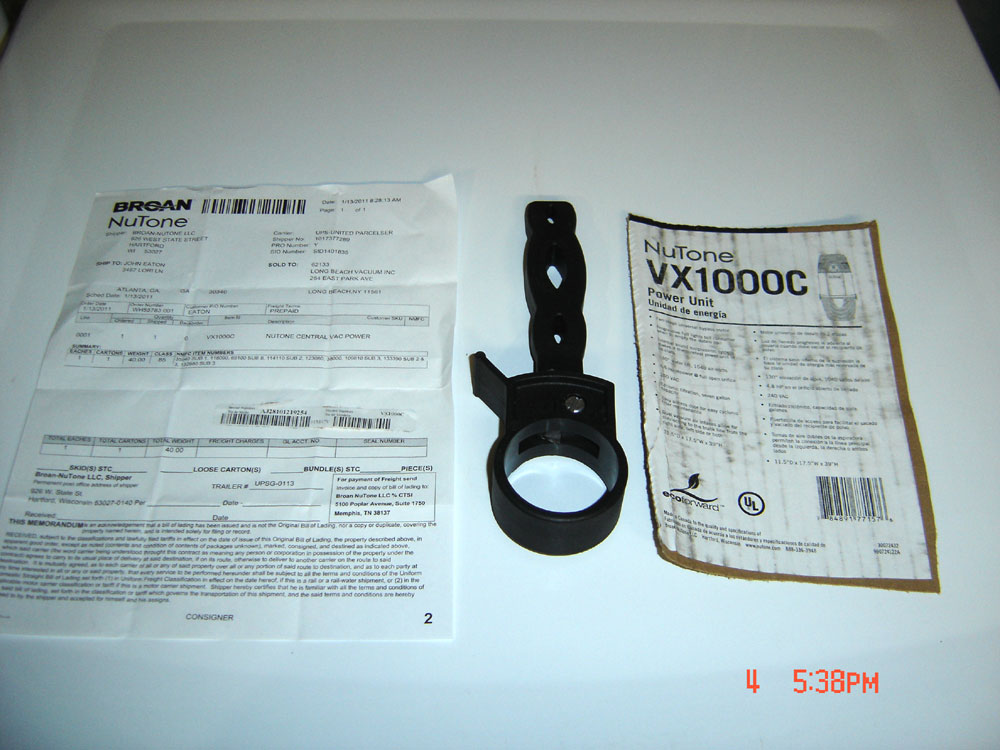
Once I decided upon the brand it was a matter of finding the best price. The 550C can be sourced easily locally (actually, right down the street off of Chamblee-Tucker Rd that stocks them with parts and fittings) at $499 if you prefer. Surprisingly the best prices I found were consistently on eBay. I started to watch a seller who was listing many vacuum systems and parts in a periodic manner with opening bids on the VX475C at $189, VX550C at $229 and the VX1000C at $299 - these were all listed as "Sales Prices" and I started to watch the trends - as you can imagine most of these units sold at about $100 over the opening price and then the bids started slowing down. The seller began taking $50 off of each starting bid. I continued to watch and then jumped on a unit closing at an awkward time (around 5:00 AM EST close to Christmas) and jumped on a VX1000C for $249 with free shipping. Here's a copy of the specs in case you're interested: VX1000C specs.
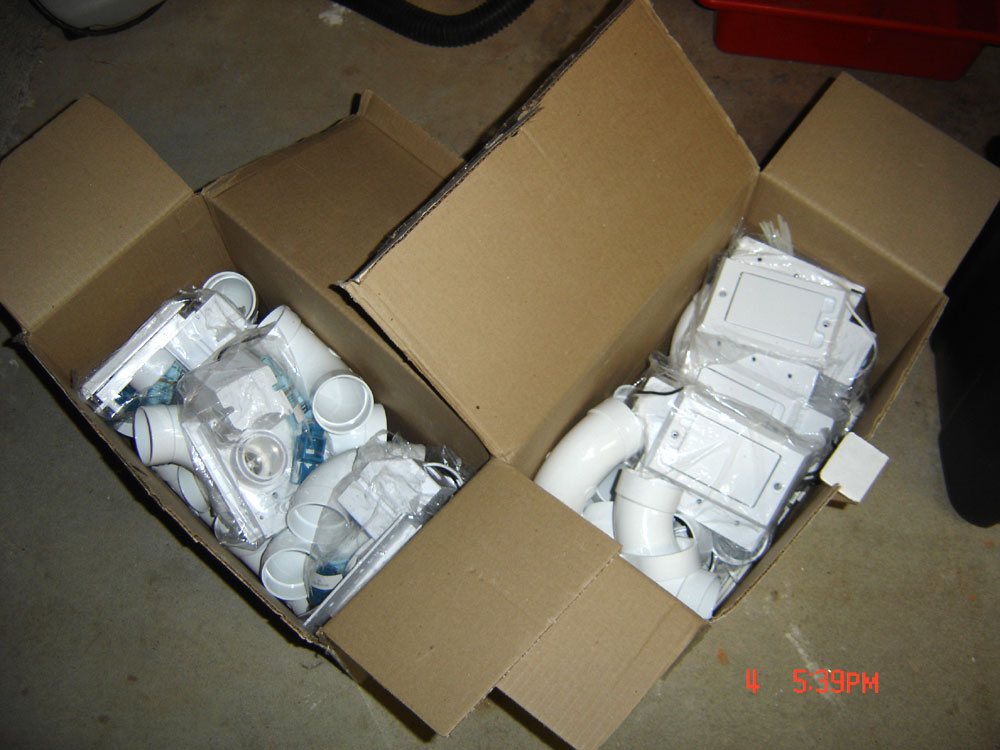
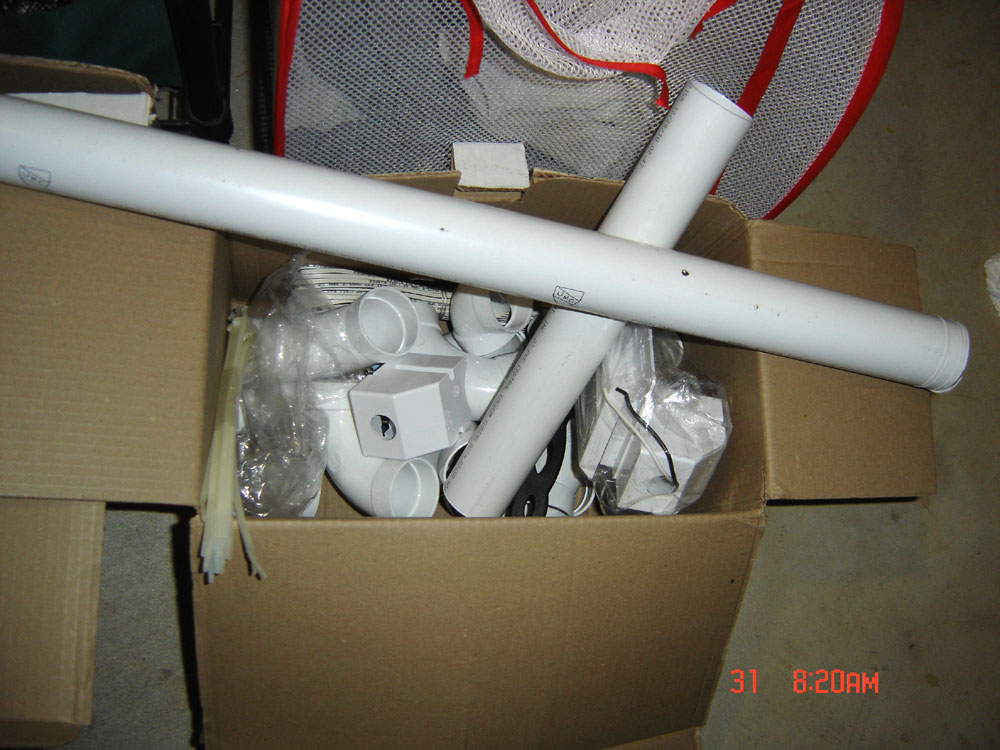
The unit appeared about two days later in the original box, with a label indicating that it had been drop-shipped directly from a Nutone distribution center. I next began the search for the PVC piping, fittings, ports and attachments. Once again eBay proved to be the best source for pretty much everything. I was actually able to purchase 200 feet of 2" PVC (not the same as for water, this is thin-walled with smooth inner surfaces) shipped from Canada cheaper than I could buy it locally - with free shipping it was about $50. I settled on two valve/fitting kits, each with three valves and all the fittings, wiring, glue, etc for a total of 6 intake valves at $29 each with free shipping. The most expensive part was the attachment kit - I settled for an unmarked Electrolux powered brush wand (I did the direct connect for power - I'll explain that in detail later) with several attachments and two wand sections and a 25 ft hose for $180. I also opted for a cloth hose cover (saves the furniture and walls). Finally, I purchased a "garage kit" (unpowered) so I could vacuum in the basement. In all with the unit and all the bits I spent less than $600. I also bought one specialty tool for cutting the PVC that was about $15 (the only thing I found cheaper off eBay and well worth buying). The only mistake I made was in buying so much pipe - turns out 80 feet would have been plenty - I'm not sure if I would have saved much as the $60 was a "deal" bulk price. Let me know if you need any pipe as I still have most of it unused.
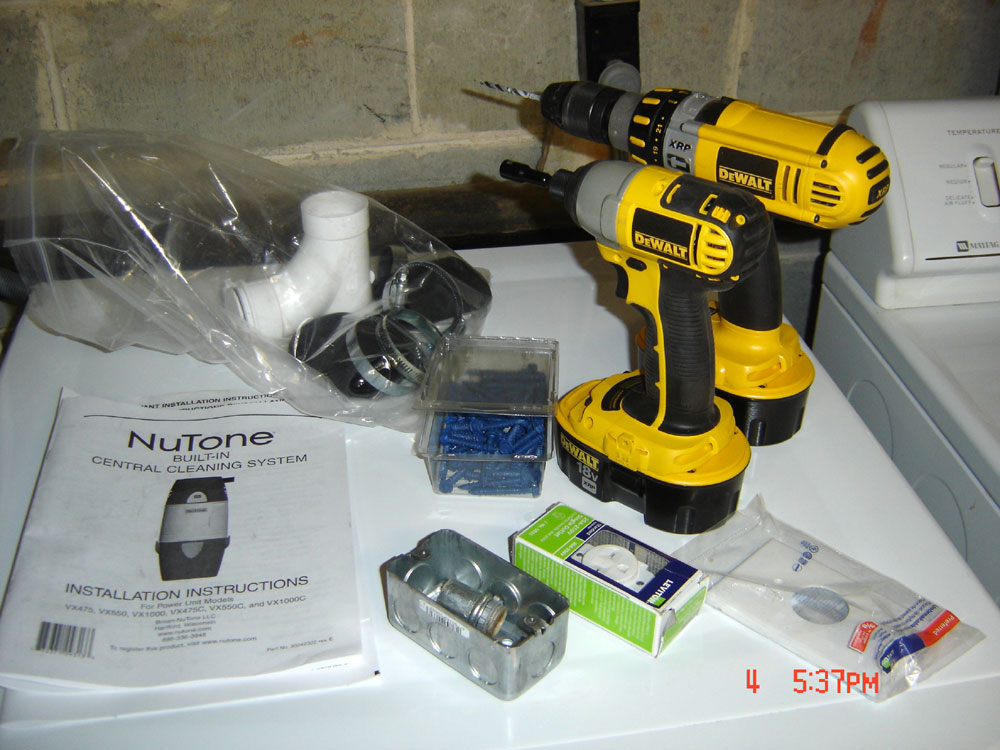
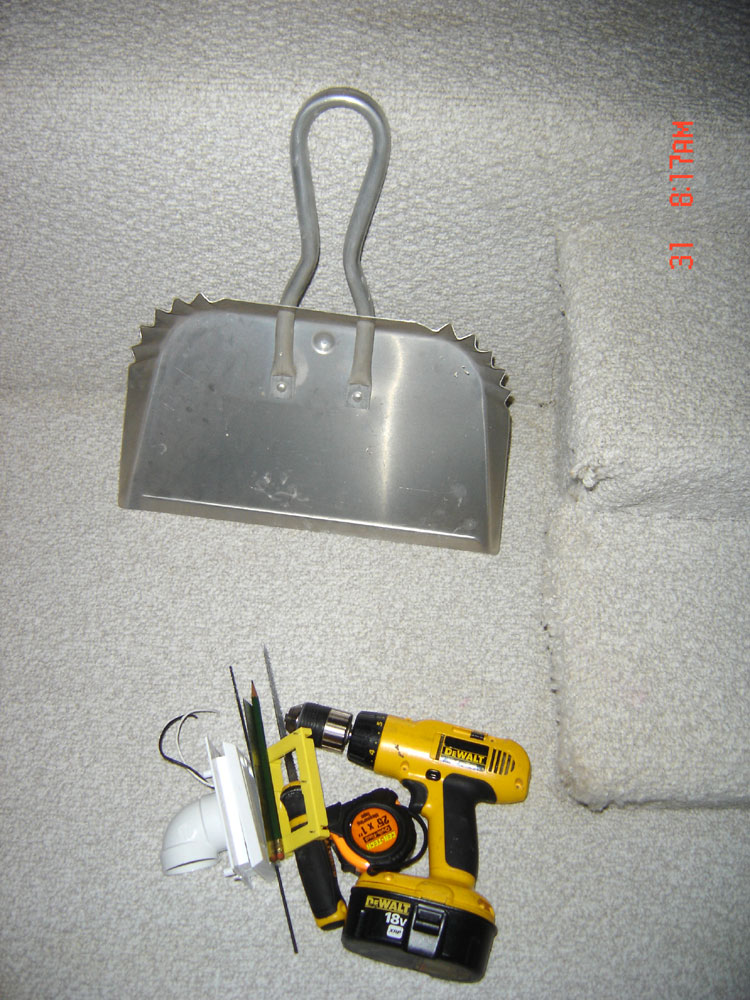
I decided to start the install the first week of May, 2011. Tools and other bits/parts assembled for the installation (note the bag in the back - it came with the power unit and includes couplings and a manual port you place next to the unit so you can use the hose in a garage/basement - basement in my case):
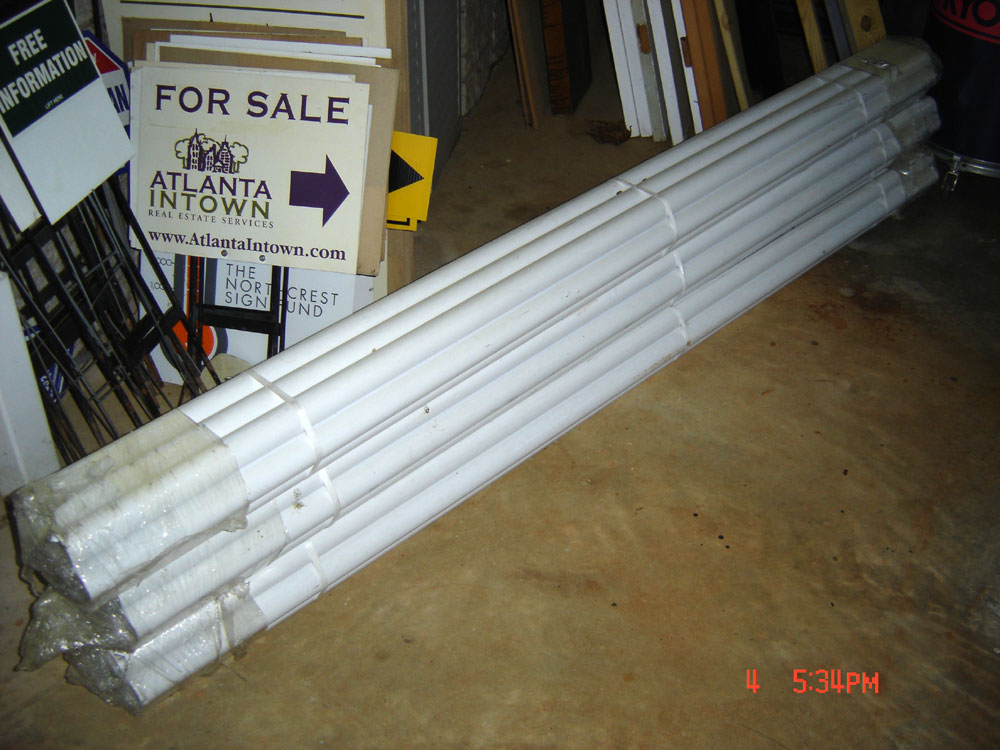
Big bundle of piping - this is specialty piping with thinner walls for vacuum installations - apparently the interior walls of regular PVC piping is too rough.
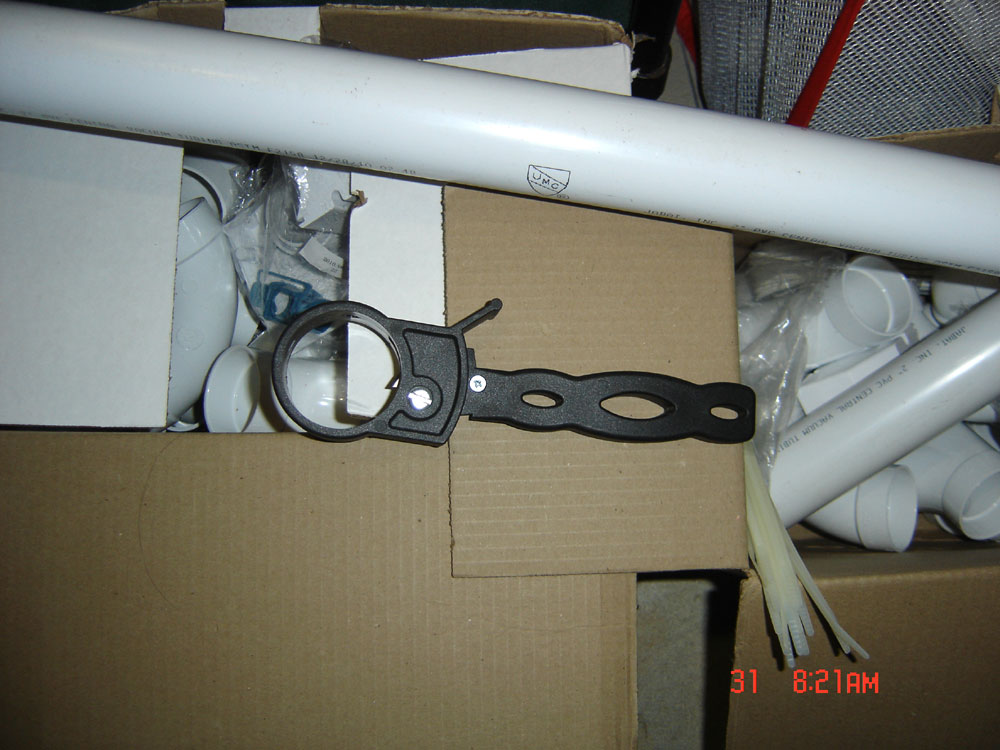
These are the kits I bought - two kits with three powered valves each - they also came with an additional unpowered valve.
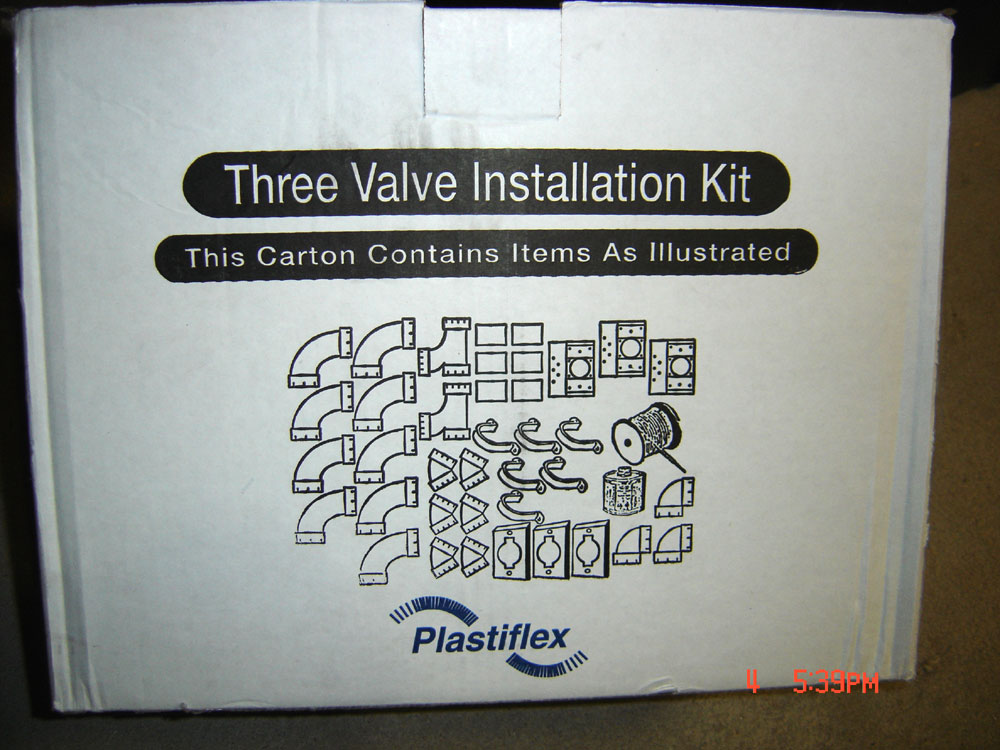
These kits come with multiple fittings to make tight and wide turns, plus 45 degree fittings, brackets and wire (the DC wiring operates the switch so the unit turns on when tripped).
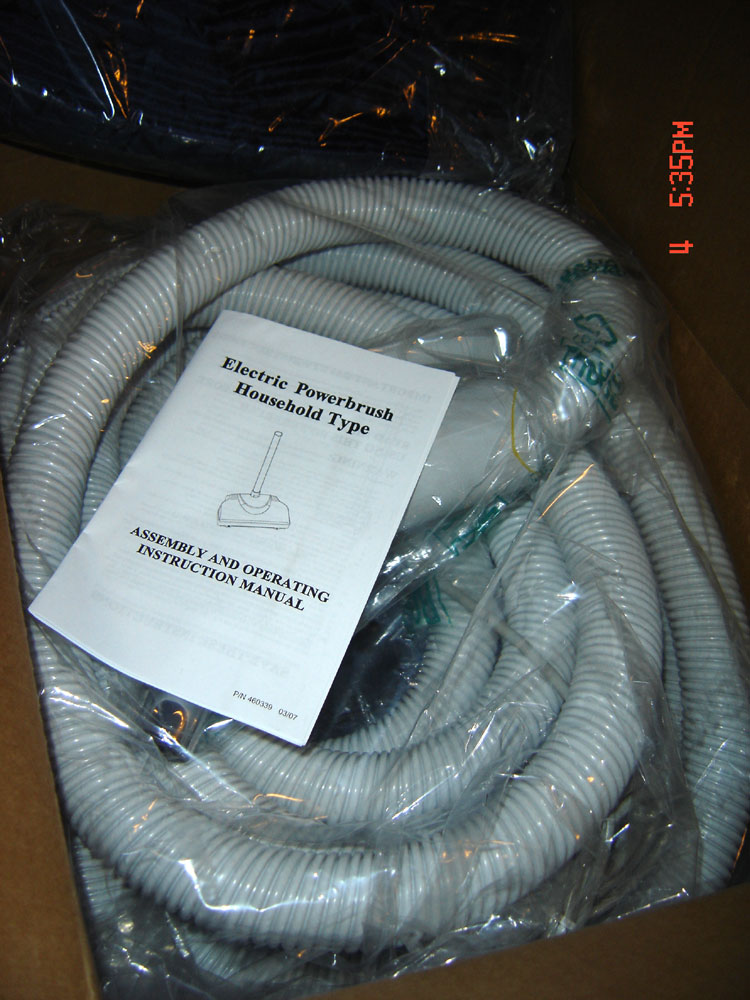
This is the hose that came with the accessory kit (the wands and heads are underneath):
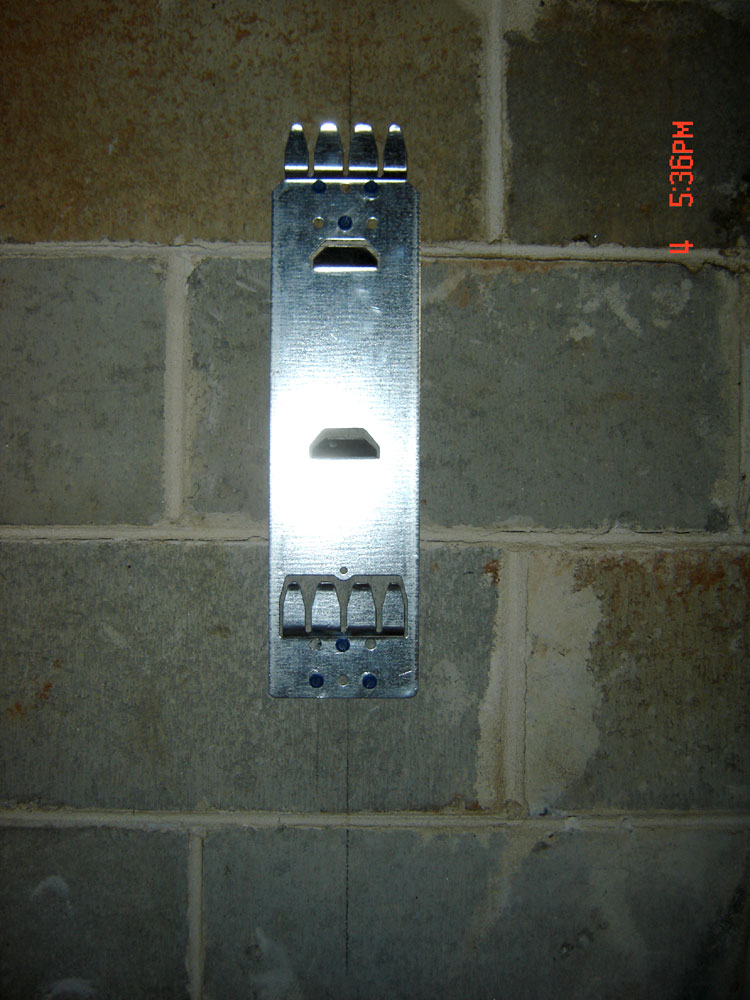
The first step in the install is to locate where you're going to put it. I don't have a lot of options since there isn't a good way to route the piping to the carport - it had to go into the basement. The problem with my basement is that only one remote quadrant is above ground (the property slopes to the back and one corner, opposite the carport). After some deliberation, I selected an area that would be convenient to the basement stairs, to the left of a plumbing down-pipe and near the washer and dryer. After locating the where, you basically hang a bracket, allowing for enough room for the piping. There are some other installation specs, like the distances the unit should be off the floor, etc., but these will vary by unit. I had to use anchors to mount the bracket to the block interior wall (note that I later removed it and applied a good urethane caulk to all cracks and two coats of Dry-Loc - I recommend that all basements in Northcrest have the same done to prevent gasses from seeping in from the surrounding earth).
This is the unit hung - note that even though it's a fairly large unit, the oval body cavity (in cross section), allows it to "snug-up" to the wall):
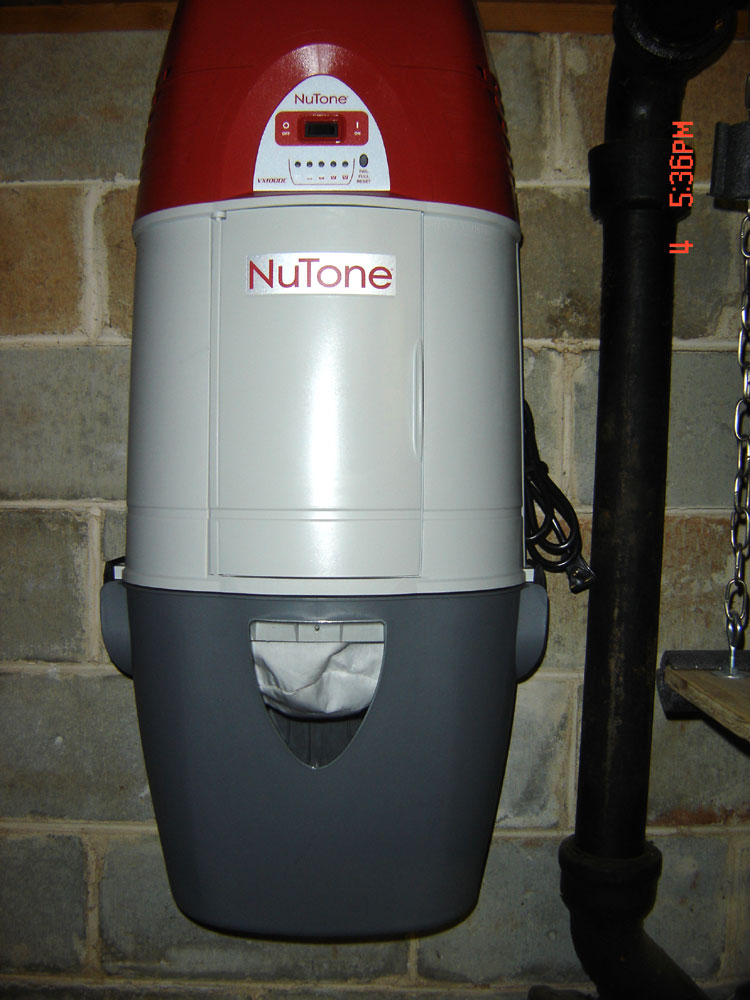
You also have to have power available and for most units that's a 120v outlet. The unit I purchased, as I've already mentioned, required a 240v. So for this part of the installation, I basically hung the unit and ran some 12/2 wiring from a dedicated two pole 240v breaker out to an outlet mounted on the ceiling. I was originally going to mount a metal breaker box on the wall but decided that with the extra length of the cord it would be easier to run it up out of the way, so switched to a rough-in box.

At this point I removed all the tape, etc. that secured the unit and plugged in to see if it worked properly. No issues. I also called it a day - actually, I stopped working on it while I worked on some other projects. That brings me to December of 2012 (time flies, right?). I decided that I needed to get all the bits and pieces off of my workbench and try to get this thing done. Nothing like having a big-ole vacuum unit hanging on the wall every time you go into the basement, to remind you that you need to finish an install.
I first took a good look at where I needed to install the powered valves on the main floor. I carefully measured, using the actual hose, to make sure that it could reach everything. Fortunately the 25 feet could reach everything when measured from the central hallway - I only had to add one valve at the end of the hall and all the bedrooms could be reached, all the way to the exterior walls. The second valve I put into the wall to the left of the two stairs. leading up to the hall. A third valve on the opposite end of the sunk-in living/dining/kitchen would reach all the way to the stairs leading down to the basement. One additional valve will need to be added when I re-do the finished based (project for later this year) - in the meanwhile, the valve next to the unit will reach the basement stairs and most of the finished basement room.
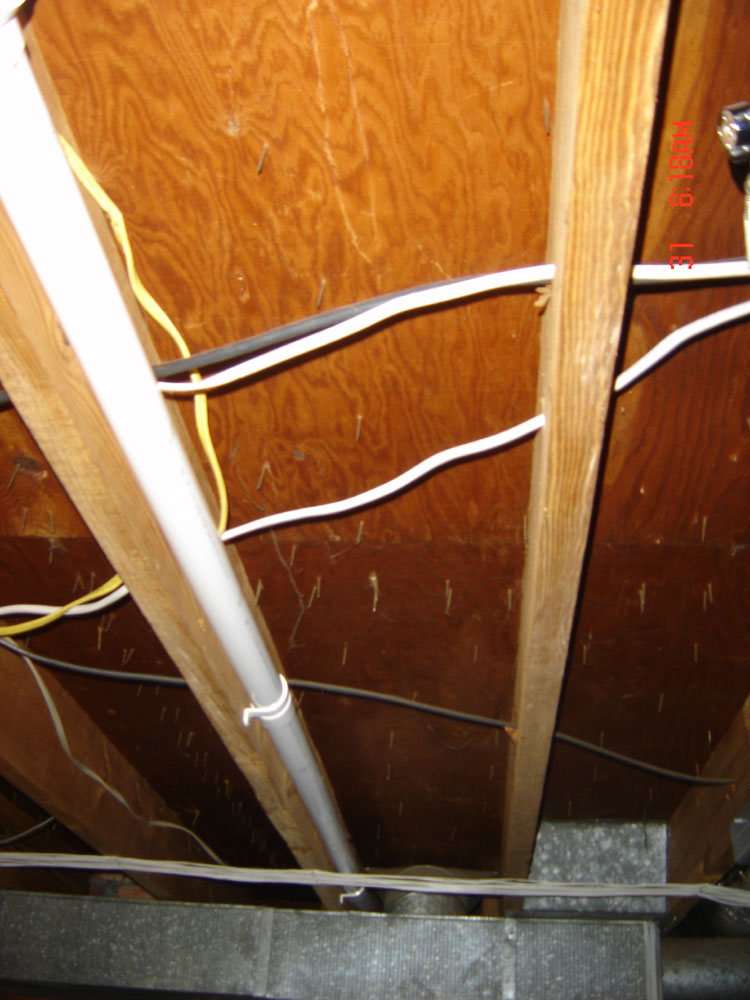
I also examined the joists and location of the powered valves from the basement side, ensuring I could reach everything. There would be one "trunk" line that runs the middle of the house pretty much the whole length, with a leg back to the unit, then an extension and drop to pick up the valve closest to the stairs. Make sure you look at any wiring and plumbing and allow for it before you cut any holes or pipe.
First valve hole at the end of the hall:

Second hole in the dining room next to the stairs to the hallway:
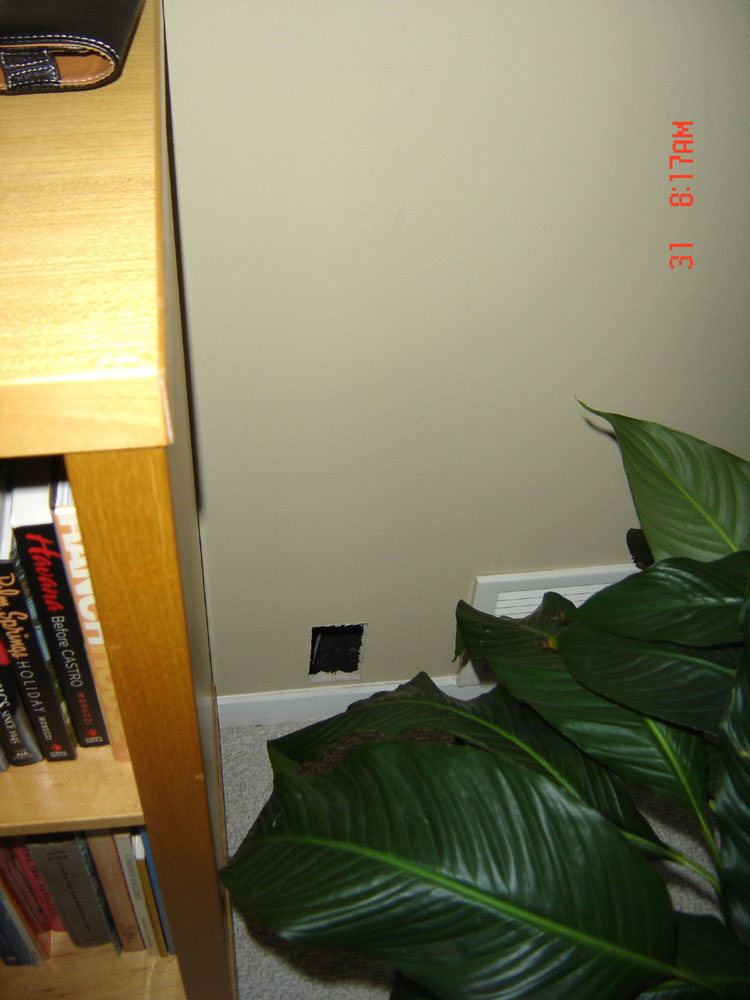
(note that on this and the third valve hole I had to locate close to the baseboard - there's a supporting double-joist just above that would have had to been "carved away" to mount the housing higher - I don't like to eliminate any supporting bottom plates so I worked around them).
To cut the hole I have this big dustpan that I use in the shop - these big pans are great for sweeping up to since they are heaving enough to not move as you brush debris onto them - they are also excellent for catching sheet-rock dust when you're cutting small openings.
So the next steps are to start running the pipe from the vacuum unit to the main trunk line (that's the length of pipe that extends along the "spine" of the house as I've already mentioned).
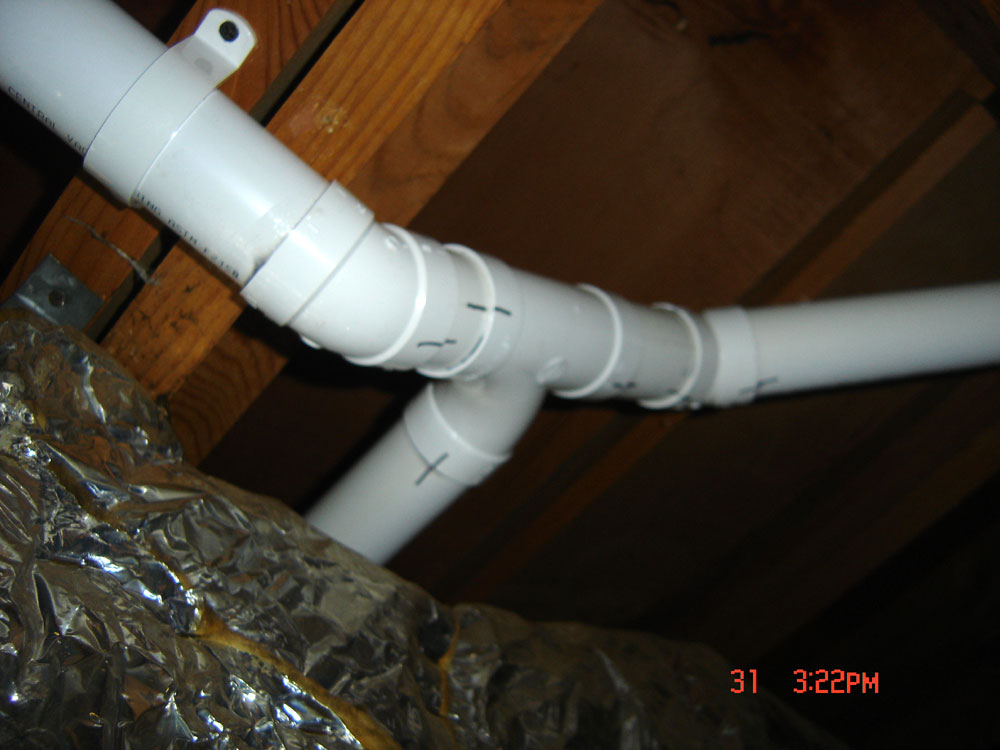
You basically cut sections as you need them until you get where you need to be, then use the various fittings to make turns or branches using "Y"s (make sure everything flows back to the vacuum)...
This is where that pipe cutter comes in handy. You lay up the next section of pipe then mark where it needs to be cut. There's a small hole in the cutter that you place over your mark, lock the cutter down so the blade in engaged and spin a couple of times for a perfectly cut end.
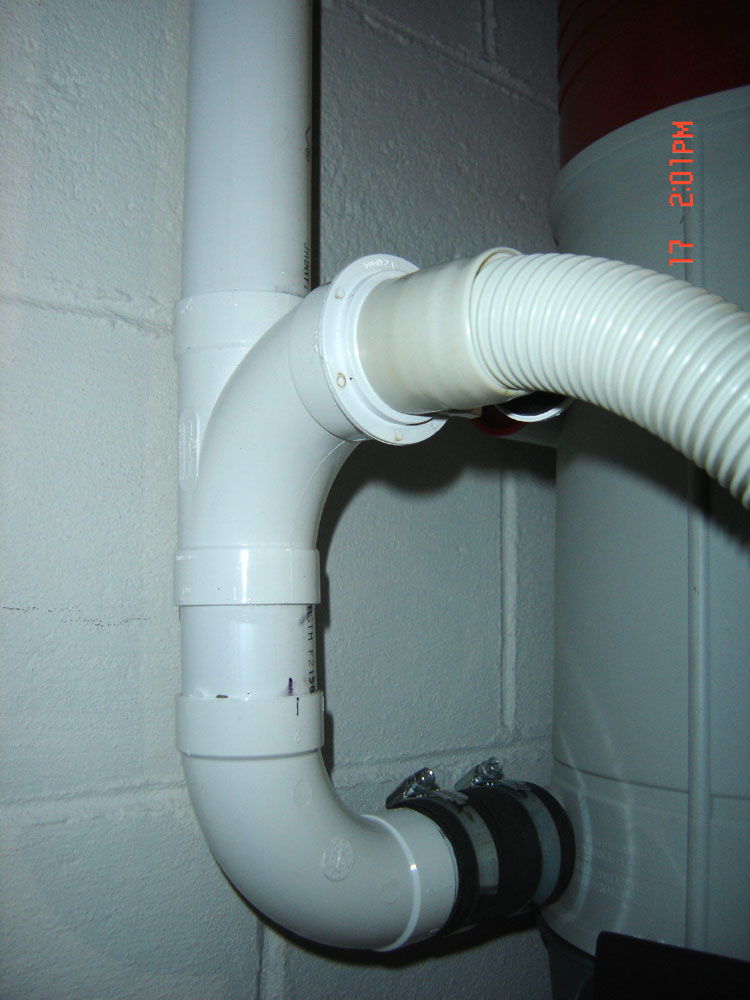
Once I got to the trunk I went to the opposite ends - the valves, and started measuring and cutting from the opening back to where I planned for the trunk line to end up. One thing to note - I almost glued the short 45 degree fitting tight to the back of the port - if you do so you'll end up blocking pipe from fitting into the other end of the fitting.
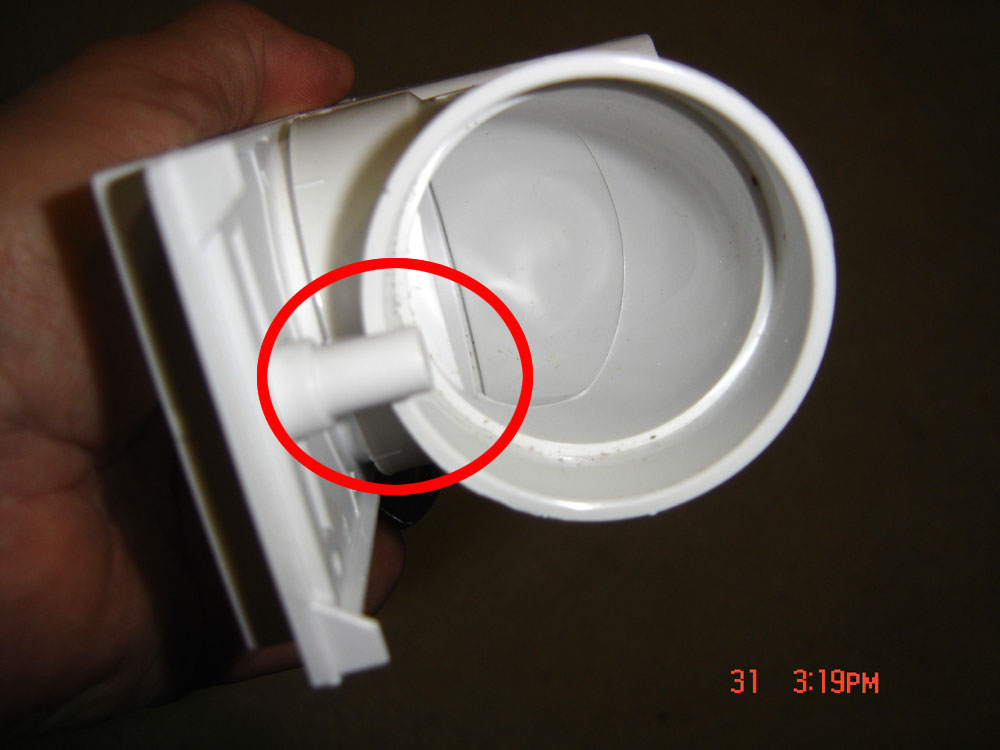
The pipe needs to clear that screw nub on the back of the port:
When selecting your valves there are two different type: powered or unpowered. The difference is that the unpowered valve does not provide an electrical connection to power an electric brush head, like you get from an upright vacuum. If you still want to power an electric head using an unpowered port, you will need to plug in a pig-tail type connector that comes at the end of the hose. This may be a good option if it's difficult to get power to where your valves are located. I choose the powered valve and ran electrical wire back to nearby outlets - this does require a bit more wiring and knowledge if you decide to go that route.
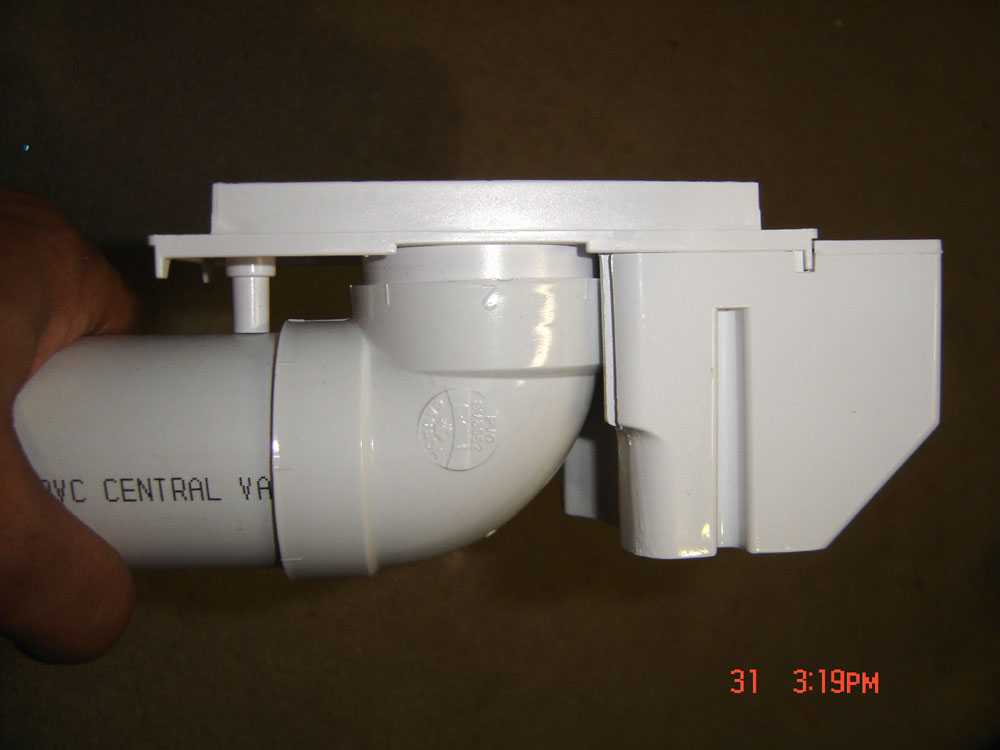
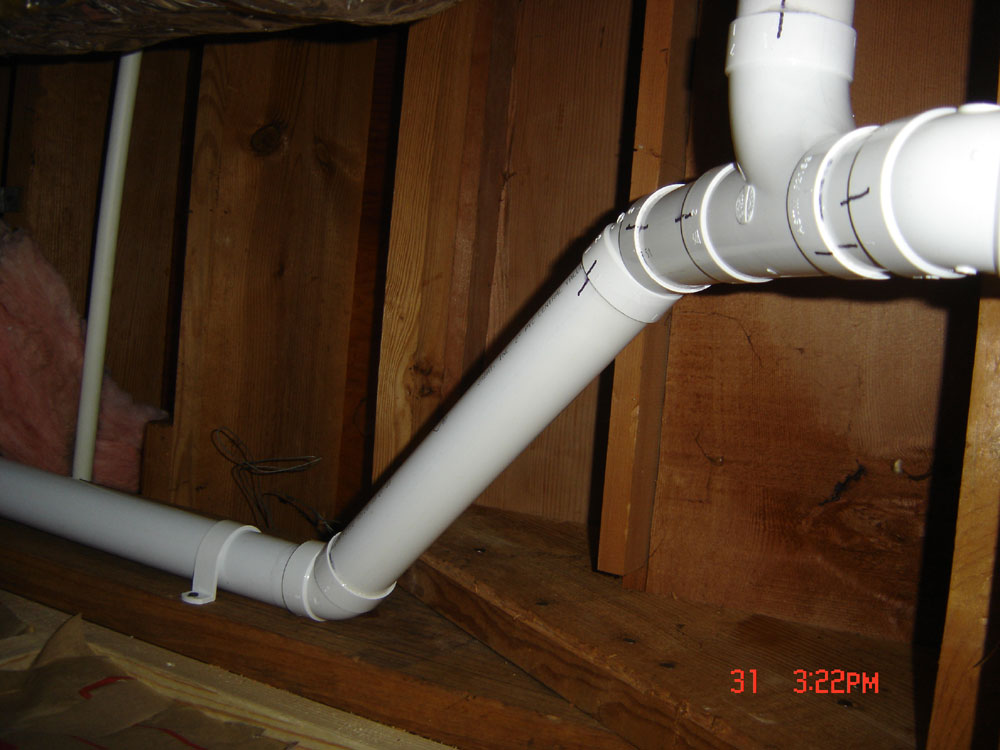
You can loosely hold the valve in place using a coat-hanger or other means (this is mentioned in the installation manuals I've got linked at the end). Measure everything and cut as you go, dry-fitting until you get back to the trunk-line. You can see the valve housing from underneath in this photo (this is the opening that comes out in my dining room). I used a piece of foam to hold things in place while I finished up the dry-fit. If you make turns and want things to come out the same, put marks on each side of the pipe-to-fitting (easier to see in later photos) - mark which-is-which (like a- to -a):
Also, you should allow for the wiring, both the low-voltage for the switch and the high-voltage if you're using a powered valve and make sure these come through the openings into the box to be wired into the port. When you have the basic shape where you want it you can start gluing, or you can wait until you have the whole thing dry-fitted, then mark and carefully dissemble. Just make sure you think through the reassembly as there may be only one order to put things together successfully (when you mess up once you won't do it again). I had to do several odd drops to clear the sunk-in flooring and such - I used the extra 45 degree elbows to accomplish this. You can see my marks in the following photos:
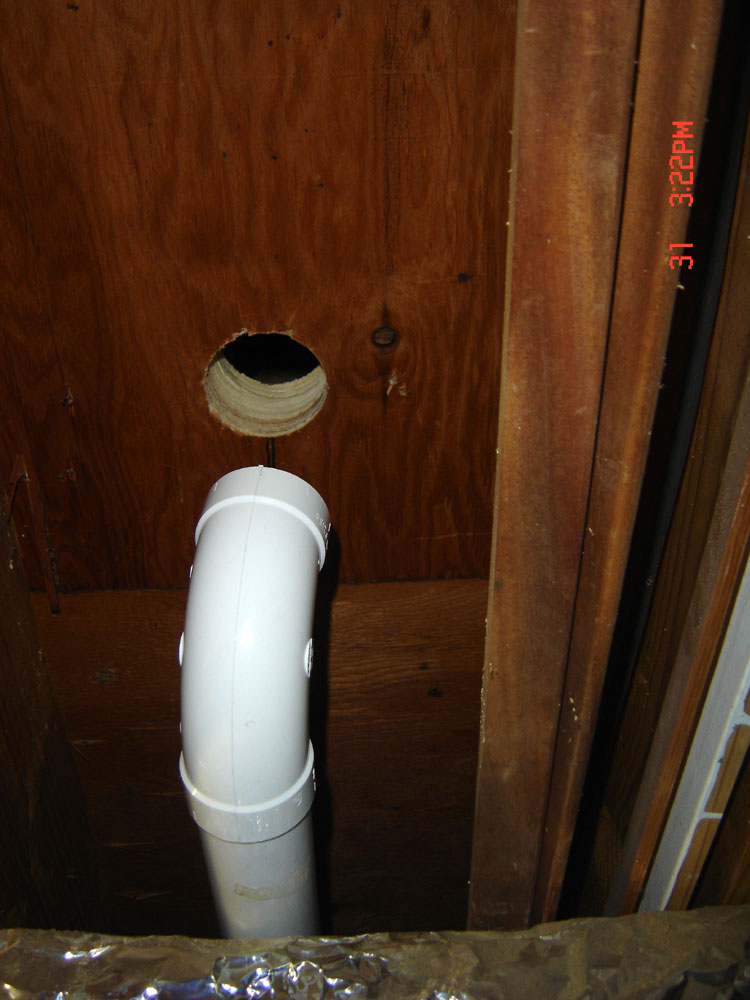
Since the end of the hall ended on a wall that was added, the bottom plate rested on the sub-floor. I located where to drill by screwing a piece of coat-hanger into the floor just below the baseboard. I then used a hole sale to cut the hole up through the bottom plate of the wall.
Keep fitting everything together and gluing your sub-assemblies until it's all together. I directly piped back to the vacuum unit itself then made a cut where I wanted the unpowered valve or port to be.
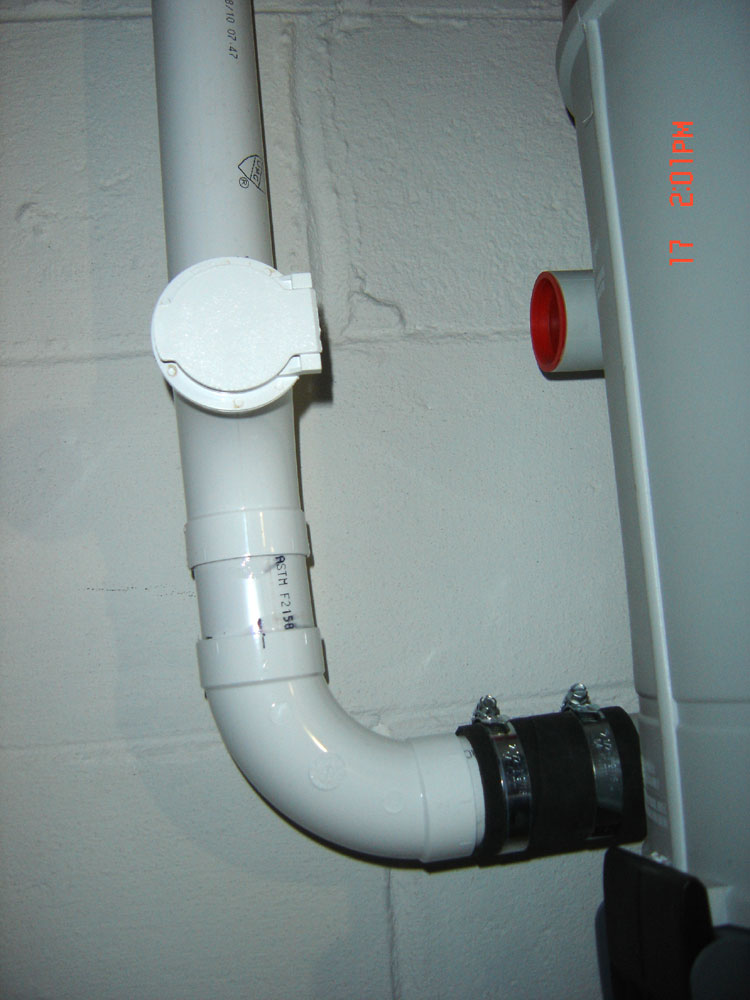
Here's the port with the second hose kit (unpowered) plugged into it:
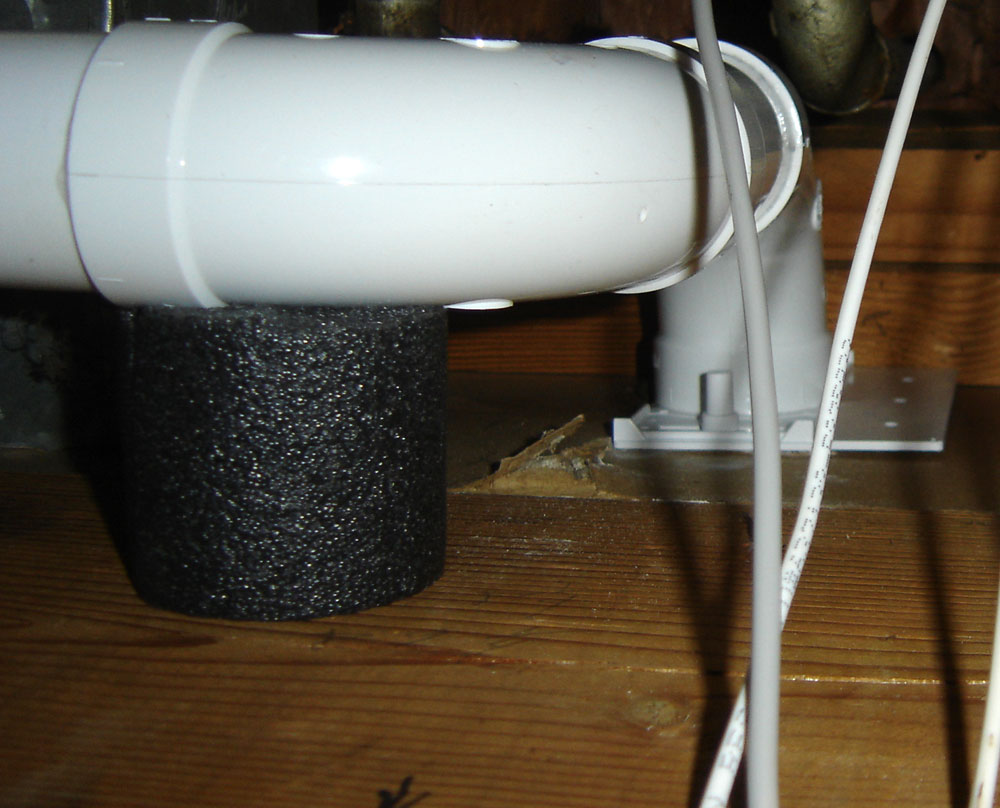
The next-to-last thing to do was to add pipe to get the other side of the vacuum (the discharge end) away from the unit. You would typically take this outside - right now I it going through a noise dampening muffler and into a filter. I'll eventually knock a hole through the block and thread the pipe to the outside.
Finally, you need to splice all the low voltage wire at any intersections and pull the wire back to the connections back at the vacuum canister. Here's a test to make sure all the wiring is working. First I turn the powered head unit on to ensure that the vacuum canister is drawing air. Next, I turn on the powered brush which you can see in the video as the light, can hear as the brush spins-up and feel when pushing forward - the head draws forward, taking much of the effort out of moving the wand over carpet. The latter ensures that you have connected up high-voltage power to each valve correctly.
At this point I had two valves installed with piping, and a stub of pipe leading to the third valve on the opposite end of the living room. Once again I stopped and worked on other projects. I then picked up and added the third port, that was this past weekend in the middle of April 2012. I still have the last port to add but it will be trivial compared to these since I have access to the other side of the wall (the back of the wall is unfinished and opens into the basement). I'm reworking that room, the large, finished part of the basement, and the valve location is yet to be determined.
These are the manuals I used to research the install. They aren't Nutone specific but they do highlight the planning and installation phases of doing an install yourself:
- Central Vacuum System Installation Guide by Central Vacuum Stores
- Central Vacuum System Installation Manual by Vaculine
- ElectraValve New Home Installation Instructions
- NuTone Built-in Central Cleaning System Homeowners Operating Instructions
-- John


No comments:
Post a Comment